pt-online-schema-change-fast-rebuild-constraints

pt-online-schema-change-fast-rebuild-constraintsというpt-oscプラグインを書きました。

これは--alter-foreign-keys-method= rebuild_constraintsを高速にするプラグインです。

通常、FKで参照されている親テーブルにpt-oscを実行しようとすると*1

pt-online-schema-change \
  --alter 'ADD num int' \
  h=localhost,u=root,D=employees,t=employees \
  --dry-run
  #--execute
$ ./pt-osc.sh
Operation, tries, wait:
  analyze_table, 10, 1
  copy_rows, 10, 0.25
  create_triggers, 10, 1
  drop_triggers, 10, 1
  swap_tables, 10, 1
  update_foreign_keys, 10, 1
Child tables:
  `employees`.`dept_emp` (approx. 331143 rows)
  `employees`.`dept_manager` (approx. 24 rows)
  `employees`.`salaries` (approx. 2838426 rows)
  `employees`.`titles` (approx. 442010 rows)
You did not specify --alter-foreign-keys-method, but there are foreign keys that reference the table. Please read the tool's documentation carefully.

こんな感じで警告が出ます。

--alter-foreign-keys-method=rebuild_constraintsをつけてexecuteしてみると

$ ./pt-osc.sh
...
2016-11-03T12:44:13 Copied rows OK.
2016-11-03T12:44:13 Swapping tables...
2016-11-03T12:44:13 Swapped original and new tables OK.
2016-11-03T12:44:13 Rebuilding foreign key constraints...
2016-11-03T12:44:35 Rebuilt foreign key constraints OK.
2016-11-03T12:44:35 Dropping old table...
2016-11-03T12:44:35 Dropped old table `employees`.`_employees_old` OK.
2016-11-03T12:44:35 Dropping triggers...
2016-11-03T12:44:35 Dropped triggers OK.
Successfully altered `employees`.`employees`.

と、FKの貼り替えに結構時間がかかってしまいます。

--alter-foreign-keys-method=drop_swapだと速いは速いんですが

2016-11-03T12:47:13 Copied rows OK.
2016-11-03T12:47:13 Drop-swapping tables...
2016-11-03T12:47:13 Analyzing new table...
2016-11-03T12:47:13 Dropped and swapped tables OK.
Not dropping old table because --no-drop-old-table was specified.
2016-11-03T12:47:13 Dropping triggers...
2016-11-03T12:47:13 Dropped triggers OK.
Successfully altered `employees`.`employees`.

テーブルが存在しない瞬間があるので、プロダクションでは使いづらいです。

pt-online-schema-change-fast-rebuild-constraints.pl

--plugin=pt-online-schema-change-fast-rebuild-constraints.plとしてやると、--alter-foreign-keys-method=rebuild_constraintsでも一瞬でFKの貼り替えが終わります。

pt-online-schema-change \
  --alter 'ADD num int' \
  --alter-foreign-keys-method=rebuild_constraints \
  --plugin=pt-online-schema-change-fast-rebuild-constraints.pl \
  h=localhost,u=root,D=employees,t=employees \
  --execute
$ ./pt-osc.sh
...
2016-11-03T12:56:53 Copied rows OK.
2016-11-03T12:56:53 Analyzing new table...
2016-11-03T12:56:53 Swapping tables...
2016-11-03T12:56:53 Swapped original and new tables OK.
Disable foreign key checks
2016-11-03T12:56:53 Rebuilding foreign key constraints...
2016-11-03T12:56:53 Rebuilt foreign key constraints OK.
Enable foreign key checks
2016-11-03T12:56:53 Dropping old table...
2016-11-03T12:56:53 Dropped old table `employees`.`_employees_old` OK.
2016-11-03T12:56:53 Dropping triggers...
2016-11-03T12:56:53 Dropped triggers OK.
Successfully altered `employees`.`employees`.

ログを見るとわかると思いますが、FKの貼り替えの前後でFKのチェックを無効化→有効化するようにしています。 これでFK追加・削除時のテーブルコピーを行わないようにして、高速化しています。

余談

「テーブルのスワップ+FKの貼り替え」はアトミックな操作じゃないので、タイミングによっては「子テーブルにデータを挿入しようとしたら旧親テーブルのFKのせいで、制約違反になる」というタイミングがあるのではないかなぁ、と思ってたりしてます。

なので、

  1. FKを無効化
  2. 子テーブルのFKを削除
  3. 親テーブルをスワップ
  4. 子テーブルのFKを再作成
  5. FKを有効化

という手順がベストではないかと考えているのですが、プラグインだけでそこまでやるのは手間がかかりそうです。

*1:employees sample databaseを使ってます

hakoのoneshotを使う

hakoで、バッチ系の一発処理用のoneshotコマンドを使ってみる。

hakoのバージョンは>= hako-0.20.2(要Ruby 2.3)

$ ruby -v
ruby 2.3.0p0 (2015-12-25 revision 53290) [x86_64-darwin15]

$ gem install hako
...
Fetching: hako-0.20.2.gem (100%)
Successfully installed hako-0.20.2
5 gems installed

まず、例のごとくECSクラスタとEC2インスタンスを準備する。

ecs-cli configure -r ap-northeast-1 -c hello-hako-oneshot
ecs-cli up \
  --keypair winebarrel \
  --capability-iam \
  --vpc vpc-... \
  --subnets subnet-... \
  --security-group sg-... \
  --instance-type m4.large

f:id:winebarrel:20160915210052p:plain

おけ。

ログ出力用CloudWatch LogsにLogGroupを作っておく。

aws logs create-log-group --log-group-name my-logs

hakoのyamlは以下のような感じ。

  • hello.yml
scheduler:
  type: ecs
  region: ap-northeast-1
  cluster: hello-hako-oneshot
  desired_count: 1
app:
  image: busybox
  memory: 128
  log_configuration:
    log_driver: awslogs
    options:
      awslogs-group: my-logs
      awslogs-region: ap-northeast-1
      awslogs-stream-prefix: example

実行してみる。

$ hako oneshot hello.yml echo hello
I, [2016-09-15T21:19:19.668005 #50187]  INFO -- : Registered task definition: arn:aws:ecs:ap-northeast-1:822997939312:task-definition/hello-oneshot:2
I, [2016-09-15T21:19:19.795313 #50187]  INFO -- : Started task: arn:aws:ecs:ap-northeast-1:822997939312:task/008875de-41d1-49ea-88c9-29ea1270384e
I, [2016-09-15T21:19:20.880933 #50187]  INFO -- : Container instance is arn:aws:ecs:ap-northeast-1:822997939312:container-instance/71b35bd6-6d06-486a-955a-6dd24b2ca1ec (ECS Instance - amazon-ecs-cli-setup-hello-hako-oneshot i-0a295d5b1ff678c4f)
I, [2016-09-15T21:19:24.158628 #50187]  INFO -- : Started at 2016-09-15 21:19:23 +0900
I, [2016-09-15T21:19:24.158756 #50187]  INFO -- : Stopped at 2016-09-15 21:19:23 +0900 (reason: Essential container in task exited)
I, [2016-09-15T21:19:24.158802 #50187]  INFO -- : Oneshot task finished
I, [2016-09-15T21:19:24.158840 #50187]  INFO -- : app has stopped with exit_code=0

ログを見てみる。

f:id:winebarrel:20160915212010p:plain

f:id:winebarrel:20160915212016p:plain

おけおけ。

Wakerを動かす

github.com

認証まわりのセットアップ

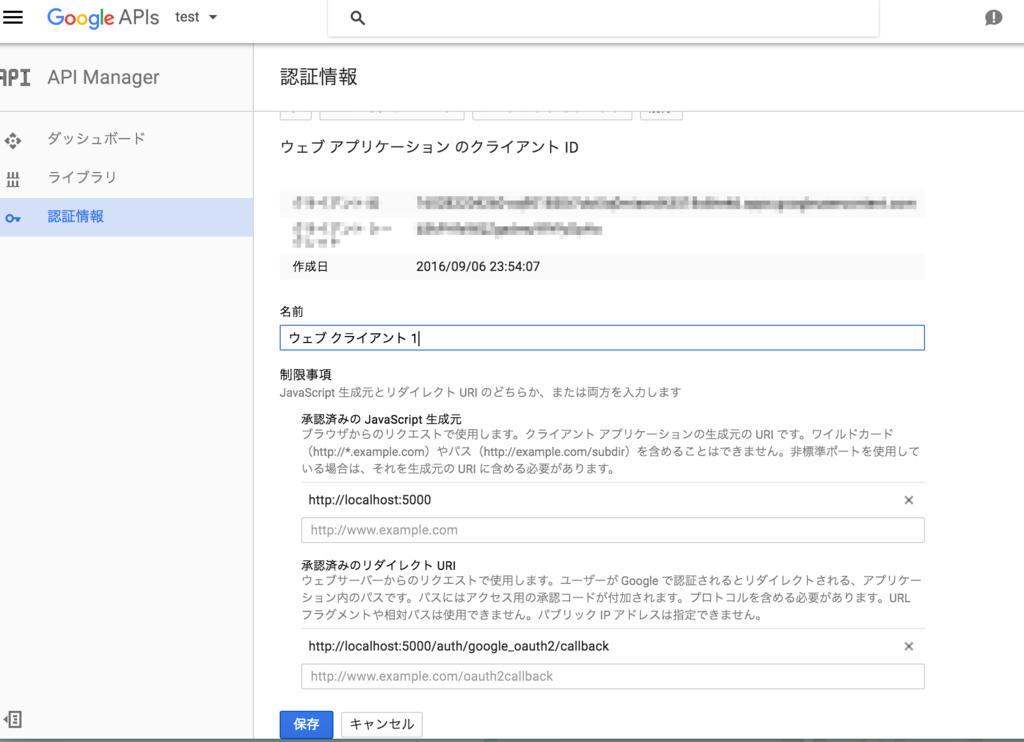
Google Developer Consoleで適当なプロジェクトを作って、OAuth 2.0 クライアント IDを発行する。

f:id:winebarrel:20160915192114p:plain

  • 承認済みの JavaScript 生成元:
    • http://localhost:5000
  • 承認済みのリダイレクト URI:
    • http://localhost:5000/auth/google_oauth2/callback

.envファイルに認証情報を書いておく。

echo 'GOOGLE_CLIENT_ID=...' >> .env
echo 'GOOGLE_CLIENT_SECRET=...' >> .env
echo 'GOOGLE_DOMAIN=...' >> .env # If you restrict to use Google Apps doma

セットアップ

まず、bundle install

$ bundle install
Using rake 11.2.2
...
Bundle complete! 31 Gemfile dependencies, 113 gems now installed.
Use `bundle show [gemname]` to see where a bundled gem is installed.

MySQLを起動。

$ mysql.server start
Starting MySQL
.. SUCCESS!

Redisも起動。

$ redis-server &
[1] 9337
...
[9337] 15 Sep 19:14:36.797 * The server is now ready to accept connections on port 6379

データベースをセットアップ。

]$ rake db:create
[DEPRECATION] `last_comment` is deprecated.  Please use `last_description` instead.
[DEPRECATION] `last_comment` is deprecated.  Please use `last_description` instead.
[DEPRECATION] `last_comment` is deprecated.  Please use `last_description` instead.
$ rake db:migrate
...
== 20160914063913 AddCommentIndex: migrated (0.0592s) =========================

サーバを起動。

$ bundle exec foreman start -f Procfile.docker
...
19:28:49 web.1                | * Listening on tcp://0.0.0.0:5000
19:28:49 web.1                | Use Ctrl-C to stop```

ユーザのセットアップ

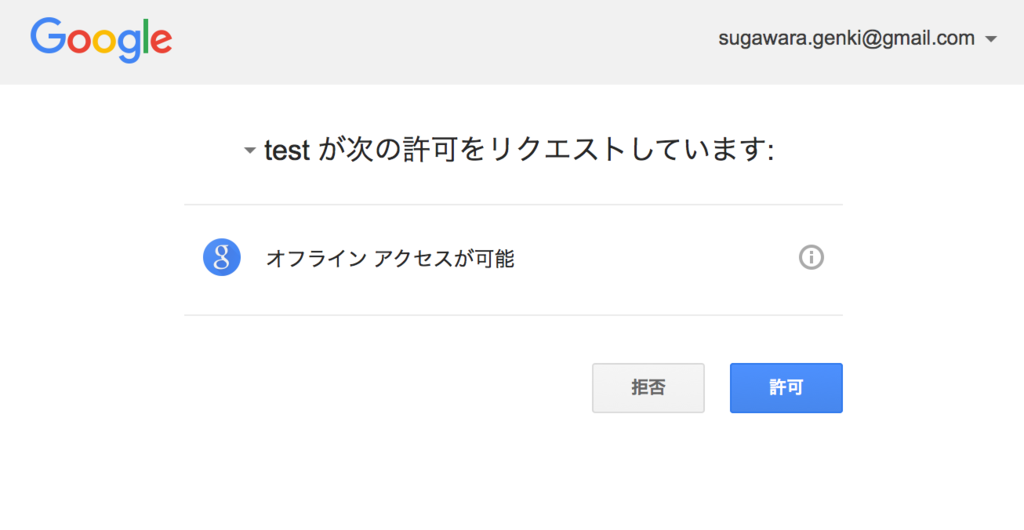
http://localhost:5000/にアクセスすると、Googleアカウントで認証される。

f:id:winebarrel:20160915193024p:plain

ただし認証直後はユーザは非アクティブ。

f:id:winebarrel:20160915193150p:plain

なので、DBをいじってアクティベートする。

$ bundle exec rails runner 'User.first.update!(active: true)'

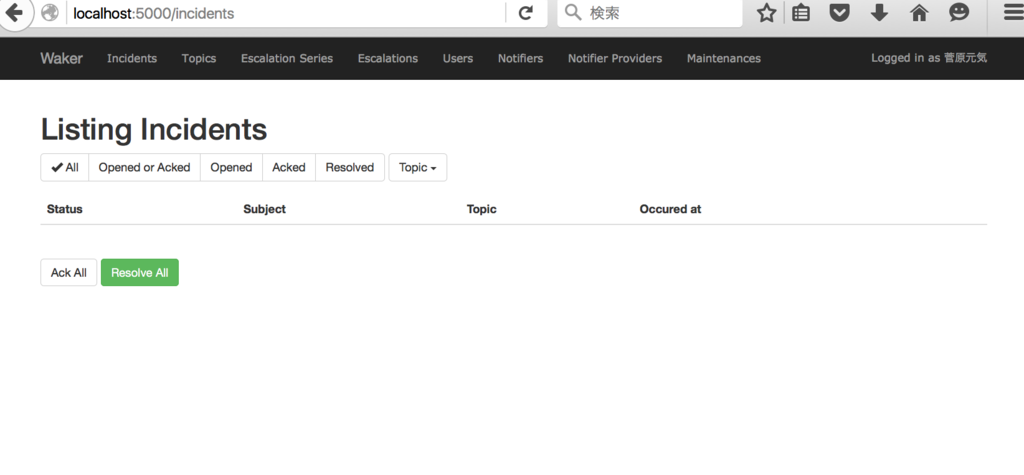
再度アクセスすると、トップ画面が表示される。

f:id:winebarrel:20160915193404p:plain

Wakerのセットアップ

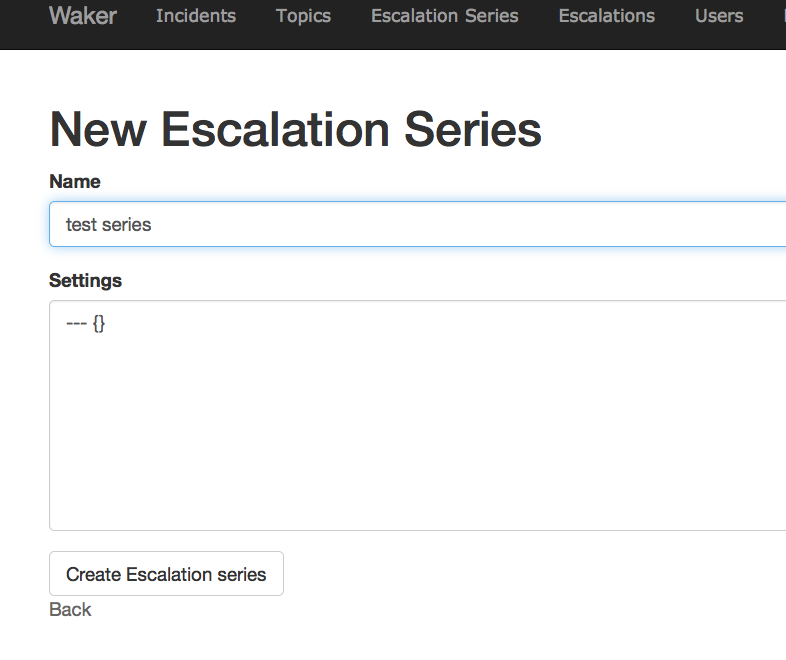
Escalation Seriesを作る

f:id:winebarrel:20160915193552p:plain

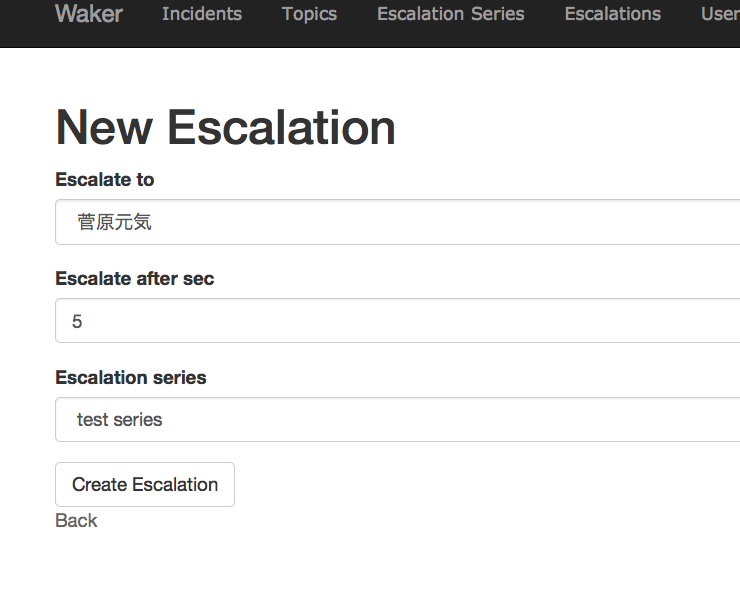
Escalationを作る

f:id:winebarrel:20160915193708p:plain

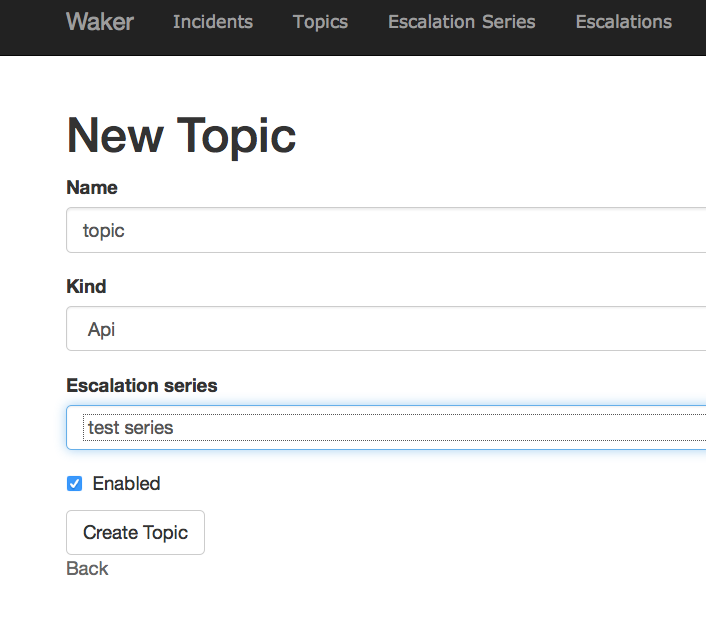
Topicを作る

f:id:winebarrel:20160915194240p:plain

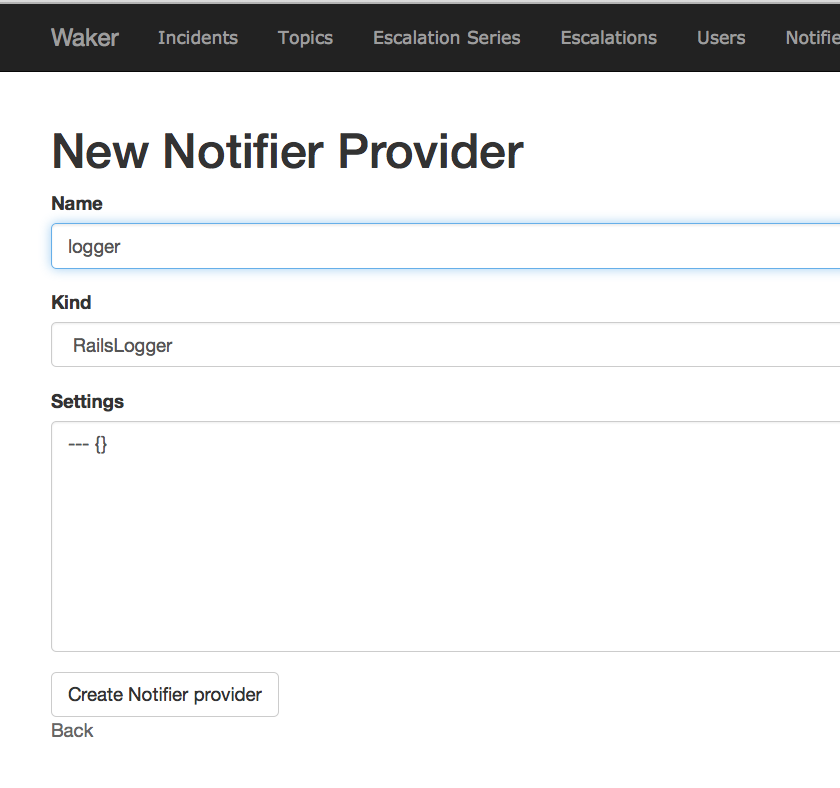
Notifier Providerを作る

今回はRailsLogger。

f:id:winebarrel:20160915193833p:plain

どういうProviderがあって、どういう設定値を必要としているかは、notifier_provider.rbを見るとよい。

Notifierを作る

今回はRailsLoggerなので、詳細な設定とユーザへのひも付けは不要。

f:id:winebarrel:20160916003738p:plain

動作確認

以下のようにcurlAPIをたたく。

$ curl -s -XPOST "localhost:5000/topics/1/mailgun.json" -d 'subject=foo&body-plain=bar'
{}

するとIncidentが作成されて

f:id:winebarrel:20160915195622p:plain

ログの方に(わかりにくいけど)

Notification: opened

と出力される。 default.text.erbをいじれば、もう少し詳細な情報を出力できる。

MailgunからIncidentを作る

Routeのとこで

f:id:winebarrel:20160915203340p:plain

こんな感じでStore and notify設定してMailgun宛てにメール投げれば、Incidentされる…はず。

IncidentのイベントをSlackに通知する

Incoming Webhookを作る

適当にIncoming Webhookを作る。

f:id:winebarrel:20160915202443p:plain

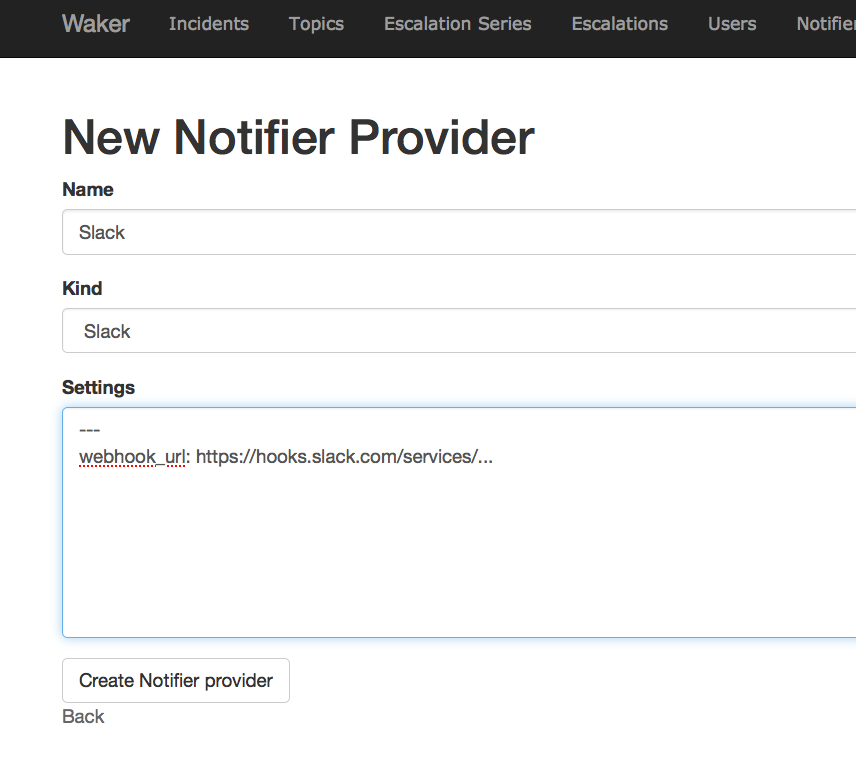
Notifier Providerを作る

f:id:winebarrel:20160915202730p:plain

Notifierを作る

f:id:winebarrel:20160916003907p:plain

動作確認

curlでIncidentを作ってみる。

 curl -XPOST "localhost:5000/topics/1/mailgun.json" -d 'subject=hello&body-plain=world'
{}

Slackに通知が来る。

f:id:winebarrel:20160915202941p:plain

hakoがALBに対応したので使ってみた

github.com

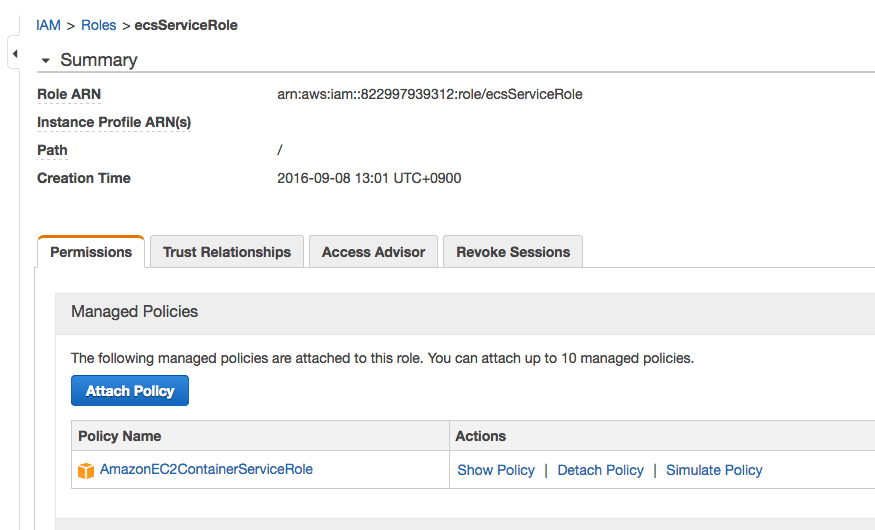
まず、ALB用のロールを作成(自動的には作成されないので要注意)

f:id:winebarrel:20160908132224p:plain

こんな感じでAmazonEC2ContainerServiceRoleをアタッチしたecsServiceRoleを作成。

新しいタスク定義は以下の通り。

  • hello-hako.yml
scheduler:
  type: ecs
  region: ap-northeast-1
  cluster: hello-hako
  desired_count: 2
  role: ecsServiceRole
  elb_v2:
    vpc_id: vpc-...
    listeners:
      - port: 80
        protocol: HTTP
    subnets:
      - subnet-...
      - subnet-...
    security_groups:
      - sg-...
app:
  image: nginx
  memory: 300
  cpu: 256
  essential: true
  mount_points:
    - container_path: /usr/share/nginx/html
      source_volume: vol
  #port_mappings:
  #  - host_port: 0
  #    container_port: 80
additional_containers:
  front:
    image_tag: nginx
    memory: 32
    cpu: 32
    port_mappings:
      - host_port: 0
        container_port: 80
    mount_points:
      - container_path: /var/log/httpd
        source_volume: log
    volumes_from:
      - source_container: app
  busybox:
    image_tag: busybox
    cpu: 64
    memory: 256
    env:
      MSG: hello
    volumes_from:
      - source_container: app
    # entry_pointはまだ使えないっぽい
    command:
      - /bin/sh
      - -c
      - |
        while true; do
          date >> /usr/share/nginx/html/index.html
          echo $MSG >> /usr/share/nginx/html/index.html
          echo '<br>' >> /usr/share/nginx/html/index.html
          sleep 3
        done
volumes:
  vol: {}
  log:
    source_path: /var/log/httpd

今回のappコンテナはnginxだけど、ただのボリューム置き場です。

frontコンテナは必須。

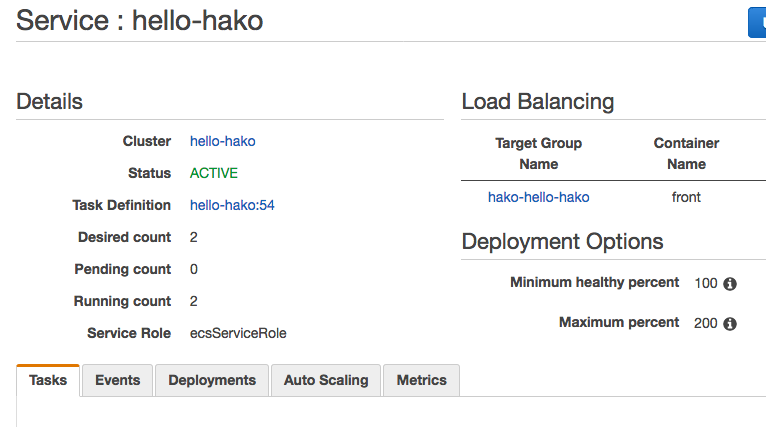
この状態で、hako deploy hello-hako.ymlすると

ELBが作られて f:id:winebarrel:20160908133330p:plain

ターゲットグループが作られて f:id:winebarrel:20160908133418p:plain

で、サービスができる。 f:id:winebarrel:20160908133511p:plain

ALBにアクセス。

~$ curl -s hako-hello-hako-910297360.ap-northeast-1.elb.amazonaws.com | head
Thu Sep  8 04:16:59 UTC 2016
hello
<br>
Thu Sep  8 04:17:02 UTC 2016
hello
<br>
Thu Sep  8 04:17:05 UTC 2016
hello
<br>
Thu Sep  8 04:17:08 UTC 2016

おけおけ。

関連: ECS+ALB+hakoでホットデプロイ - so what

Dockerでrpm/debを作成するサンプルプロジェクトを作ってみた

Docker for Macもstableになったし、Vagrantを立ち上げるのもめんどくさくなってきたので、Dockerでrpmdebを作成するサンプルプロジェクトを作ってみた。

github.com

rpm

OSはCentOS6。

$ make docker:build:centos
docker build -f Dockerfile.centos6 -t docker-pkg-build-centos6 .
...

$ make rpm
docker run --name docker-pkg-build-centos6 -v /Users/sugawara/src/docker-pkg-build:/tmp/src docker-pkg-build-centos6 make -C /tmp/src docker:rpm
...

$ ls pkg/
hello-0.1.0-1.el6.src.rpm       hello-0.1.0-1.el6.x86_64.rpm

deb

OSはUbuntu Trusty.

$ make docker:build:ubuntu
docker build -f Dockerfile.ubuntu-trusty -t docker-pkg-build-ubuntu-trusty .
...

$ make deb
docker run --name docker-pkg-build-ubuntu-trusty -v /Users/sugawara/src/docker-pkg-build:/tmp/src docker-pkg-build-ubuntu-trusty make -C /tmp/src docker:deb
...

$ ls pkg/
hello_0.1.0.dsc         hello_0.1.0_amd64.changes
hello_0.1.0.tar.gz          hello_0.1.0_amd64.deb

tempwork: テンポラリディレクトリでコマンドを実行するコマンド

テンポラリディレクトリを作って、その中で作業して、テンポラリディレクトリを消す…というスクリプトを年間に百回ぐらい書いている気がしたので、うまくラッピングしてくれるtempworkというコマンドを書きました。

github.com

Usage: tempwork command...

tempworkに続いてコマンドを並べると、テンポラリディレクトリを自動的に作成し、そこに移動してからコマンドを実行して、終わったらテンポラリディレクトリを削除します。

$ tempwork bash -c 'pwd; date > tmp.txt; ls ; cat tmp.txt'
# ↓作成されたテンポラリディレクトリ
/private/var/folders/xc/phct0zx57cgc4z07mkt7pp8w0000gp/T/tempwork859985632
tmp.txt # ←テンポラリディレクトリに作成したファイル
Sat Sep  3 18:38:24 JST 2016 # ←ファイルの中身

$ ls /private/var/folders/xc/phct0zx57cgc4z07mkt7pp8w0000gp/T/tempwork859985632
# ↓コマンドが終了したら、テンポラリディレクトリは削除される
ls: /private/var/folders/xc/phct0zx57cgc4z07mkt7pp8w0000gp/T/tempwork859985632: No such file or directory

いままでシェルスクリプトの中でmktemp -dを実行して変数に保存してcdして、コマンドが終了したら削除して…とかやっていたんですが、tempworkを使うとtempwork ./script.shでその辺をいい感じにしてくれます。

$ echo -e '#!/bin/sh\npwd\necho hello' > tmp.sh
$ chmod +x tmp.sh
$ tempwork ./tmp.sh
/private/var/folders/xc/phct0zx57cgc4z07mkt7pp8w0000gp/T/tempwork037699548
hello

どうぞご利用ください。

追記

shebangで使えるようにした。

$ cat ./tmp.sh
#!/usr/bin/tempwork /bin/bash
echo hello
pwd

$ ./tmp.sh
hello
/private/var/folders/xc/phct0zx57cgc4z07mkt7pp8w0000gp/T/tempwork708816166

reloadできるunicorn+railsのDockerイメージ

reloadできるunicorn+railsのDockerイメージを作れそうだったので作ってみた。

以下、登場人物。

Dockerfile

FROM ubuntu:xenial
MAINTAINER Genki Sugawara <sgwr_dts@yahoo.co.jp>

USER root
WORKDIR /

RUN apt-get update
RUN apt-get install -y ruby
RUN apt-get install -y ruby-dev
RUN apt-get install -y build-essential
RUN apt-get install -y zlib1g-dev
RUN apt-get install -y libxml2-dev
RUN apt-get install -y libsqlite3-dev
RUN apt-get install -y nodejs
RUN gem install rails
RUN rails new hello --skip-bundle
RUN sed -i '/puma/d' hello/Gemfile
RUN echo 'gem "unicorn"' >> hello/Gemfile
RUN bundle config --global silence_root_warning 1
RUN cd /hello && bundle
ADD unicorn.conf.rb /hello/config/

ADD init.sh /
RUN chmod +x /init.sh

EXPOSE 8080

CMD ["/init.sh"]

init.sh

#!/bin/bash
RUNNING=1

function unicorn_pid() {
  cat /hello/tmp/pids/unicorn.pid
}

function stop() {
  SIGNAL=$1
  PID=$(unicorn_pid)
  send_signal $SIGNAL

  for i in {1..60}; do
    ps -eo pid | egrep -q "^ +$PID$"
    [ $? -ne 0 ] && break
    echo -n .
    sleep 1
  done

  RUNNING=0
}

function send_signal() {
  SIGNAL=$1
  kill -$SIGNAL $(unicorn_pid)
}

for SIGNAL in $(trap -l | awk -v RS='[\t\n]' '$0 != ""{print $2}'); do
  case $SIGNAL in
    SIGINT | SIGKILL | SIGTERM)
      trap "stop $SIGNAL" $SIGNAL
      ;;
    SIGWINCH)
      ;;
    *)
      trap "send_signal $SIGNAL" $SIGNAL
      ;;
  esac
done

cd /hello
bundle exec unicorn_rails -c config/unicorn.conf.rb -E production -D

while true; do
  if [ $RUNNING -eq 0 ]; then
    break;
  fi

  sleep 1
done

echo unicorn has stopped

unicorn.conf.rb

rails_root = File.expand_path('../..', __FILE__)

worker_processes 4

listen 8080, :tcp_nopush => true

timeout 30

pid "#{rails_root}/tmp/pids/unicorn.pid"

stderr_path "#{rails_root}/log/unicorn.stderr.log"
stdout_path "#{rails_root}/log/unicorn.stdout.log"

preload_app true

check_client_connection false

run_once = true

before_fork do |server, worker|
  defined?(ActiveRecord::Base) and
    ActiveRecord::Base.connection.disconnect!

  if run_once
    run_once = false
  end

  old_pid = "#{server.config[:pid]}.oldbin"
  if old_pid != server.pid
    begin
      sig = (worker.nr + 1) >= server.worker_processes ? :QUIT : :TTOU
      Process.kill(sig, File.read(old_pid).to_i)
    rescue Errno::ENOENT, Errno::ESRCH
    end
  end
end

after_fork do |server, worker|
  defined?(ActiveRecord::Base) and
    ActiveRecord::Base.establish_connection
end

reloadしてみる

まずdocker build

$ docker build -t app .

起動して中身を確認。

$ docker run --name my-app app
$ docker exec my-app ps awxuf
USER       PID %CPU %MEM    VSZ   RSS TTY      STAT START   TIME COMMAND
root       123  0.0  0.1  34424  2872 ?        Rs   18:32   0:00 ps awxuf
root         1  0.1  0.1  18056  2848 ?        Ss   18:31   0:00 /bin/bash /init.sh
root        14  3.9  3.5 195808 72116 ?        Sl   18:31   0:02 unicorn_rails master -c config/unicorn.conf.rb -E production -D
root        17  0.0  3.2 195808 67080 ?        Sl   18:31   0:00  \_ unicorn_rails worker[0] -c config/unicorn.conf.rb -E production -D
root        20  0.0  3.2 195808 67080 ?        Sl   18:31   0:00  \_ unicorn_rails worker[1] -c config/unicorn.conf.rb -E production -D
root        23  0.0  3.2 195808 67016 ?        Sl   18:31   0:00  \_ unicorn_rails worker[2] -c config/unicorn.conf.rb -E production -D
root        26  0.0  3.2 195808 67080 ?        Sl   18:31   0:00  \_ unicorn_rails worker[3] -c config/unicorn.conf.rb -E production -D
root       122  0.0  0.0   4380   708 ?        S    18:32   0:00 sleep 1

masterのpidは14

reloadしてみる。

$ docker kill -s USR2 my-app
my-app
$ docker exec my-app ps awxuf
USER       PID %CPU %MEM    VSZ   RSS TTY      STAT START   TIME COMMAND
root       231  0.0  0.1  34424  2944 ?        Rs   18:33   0:00 ps awxuf
root         1  0.0  0.1  18060  2860 ?        Ss   18:31   0:00 /bin/bash /init.sh
root       182  7.2  3.5 195812 73632 ?        Sl   18:32   0:02 unicorn_rails master -c config/unicorn.conf.rb -E production -D
root       188  0.0  3.3 195812 68044 ?        Sl   18:32   0:00  \_ unicorn_rails worker[0] -c config/unicorn.conf.rb -E production -D
root       191  0.0  3.2 195812 67336 ?        Sl   18:32   0:00  \_ unicorn_rails worker[1] -c config/unicorn.conf.rb -E production -D
root       194  0.0  3.2 195812 67340 ?        Sl   18:32   0:00  \_ unicorn_rails worker[2] -c config/unicorn.conf.rb -E production -D
root       197  0.0  3.2 195812 67344 ?        Sl   18:32   0:00  \_ unicorn_rails worker[3] -c config/unicorn.conf.rb -E production -D
root       230  0.0  0.0   4380   676 ?        S    18:33   0:00 sleep 1

masterのpidは182。 pidが変わっていることを確認。

SIGTERMでgracefulな終了。

$ docker kill -s TERM my-app
$ docker run --name my-app app
.unicorn has stopped